Reference Creations has become one of Papercurve's most powerful and speedy features. We've focused on making reference creations an instinctual and time-saving experience for our users. With our newest update, our customers are able to link medical claims and annotations at a speed enhancement of 10x! Users also have the ability to assign unique labels to each and every one of their annotations providing them an additional edge for auditing and content management purposes. To learn more about unique label creation, check out our Knowledge Base article on Reference Labels.
Creating references can be done via 2 methods:
- Highlighting and linking a Reference Annotation
- Using the Reference Pin
Method 1: Highlighting an Excerpt
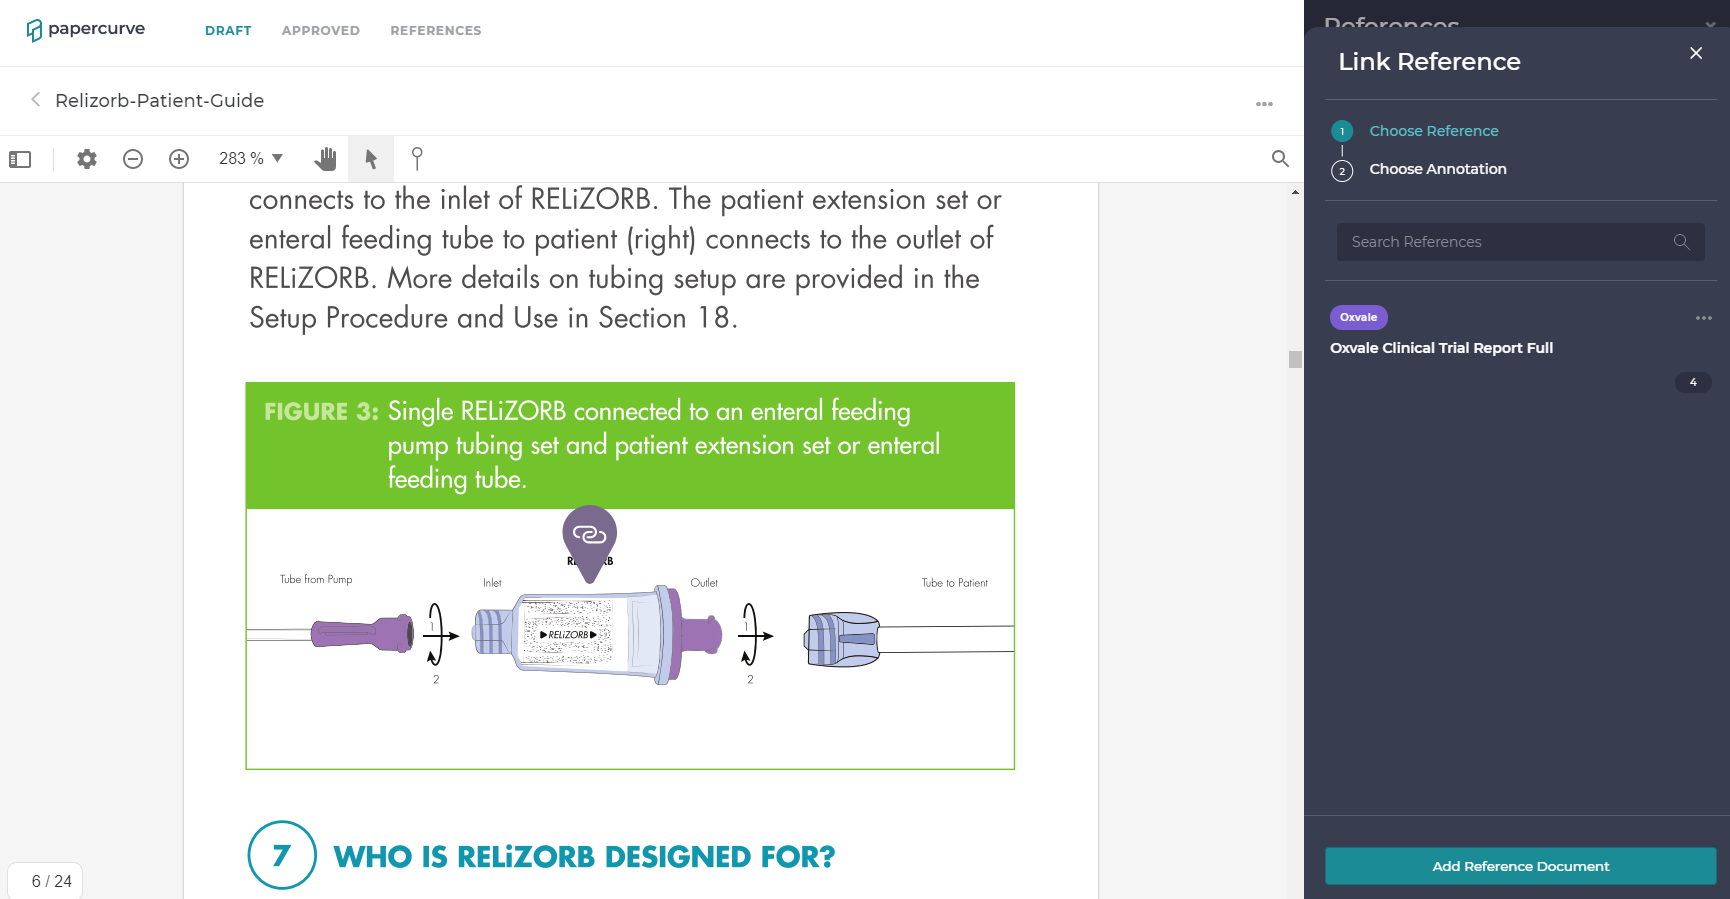
- Users can begin by highlighting an excerpt in their main document. This will trigger a comment and link icon to appear. Click on the link icon to trigger the "Link Reference" side panel to open.
.png)
- The user now has the option to a) select a previously linked Reference Document from the list or b) add a new Reference Document by selecting "Add Reference Document."
.png)
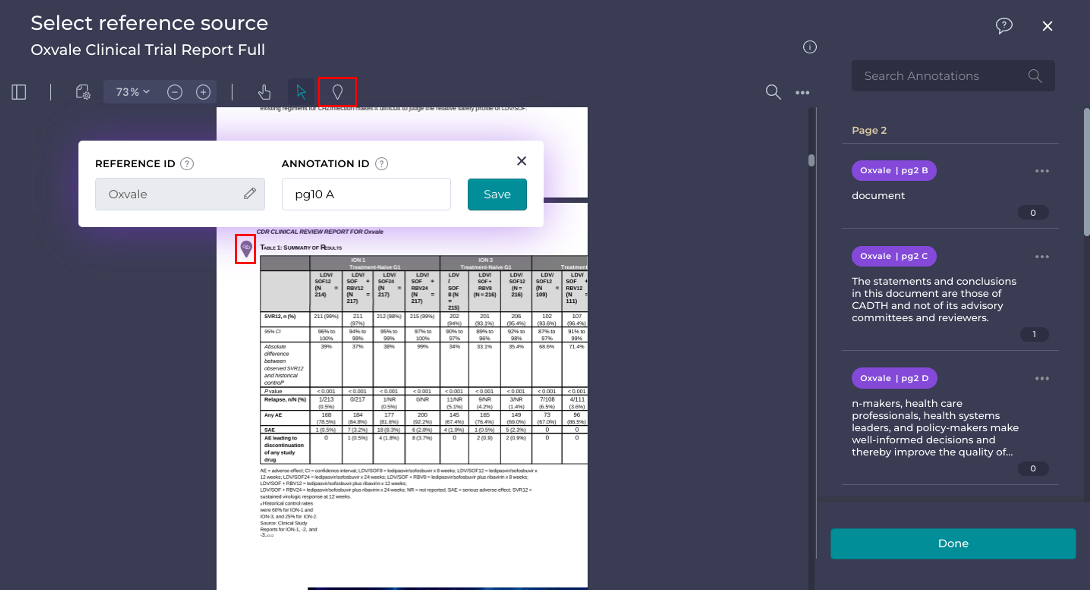
- a) Once a Reference Document is selected, the user will be shown a list of previously created annotations from the Reference Document. They now have the ability to link the annotation to the highlighted excerpt (triggering our Rapid References feature), or click on "Create New Annotation" to create an entirely new reference annotation from the selected Reference Document. This will direct the user to the Reference Document where they can search, highlight, and save the new annotation.
.png)
- b) If the user chose to Add a new Reference Document, they will be directed to the Reference Library pertaining to the document and can either select a current reference document or upload a new one by clicking on the Upload button.
.png)
- After selecting or uploading a new reference document as per 3b), the user will be directed back to the main document where they can follow steps 3a) to link a reference annotation to the highlighted excerpt.
Method 2: Using the Reference Pin
- Click on the pin button on the top tool bar and select the link icon.
.png)
- After clicking on any space in your document that requires a linked reference, the Link Reference side panel will open.

- At this point, you can follow steps 2-4 from Method 1 to link a reference annotation to your reference pin.
- You can also add a reference pin inside the reference document itself by clicking the pin and clicking on a space inside the document.

- When a reference is created by a pin, it will appear as such:


