Electronic signatures on Papercurve allows users to directly add their signature onto a document without leaving the platform. This feature is in accordance to FDA CFR 21 Part 11 on adding and tracking Electronic Signatures and replaces the hassle of physically handwriting signatures or the need to export a file to another document editing program such as Adobe Acrobat. An eSignature captures who signed, what they signed, and the intent. This could be a contract or an approval to a form.
How it Works
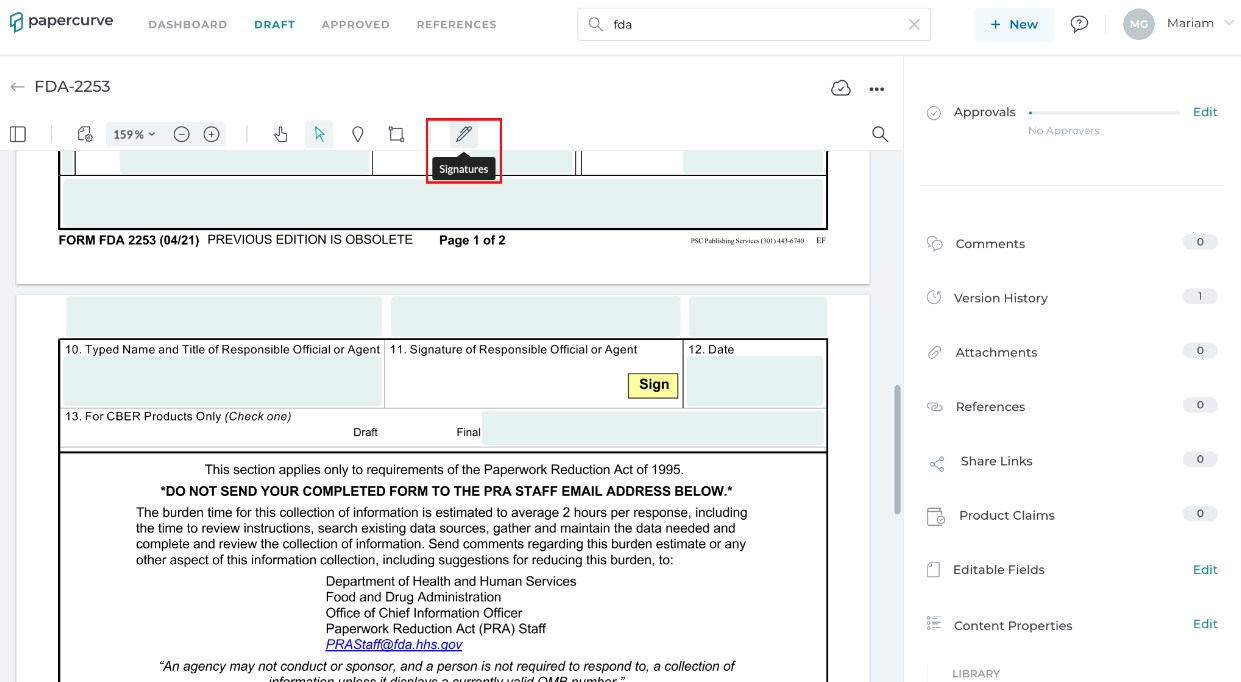
1. To begin, upload your document onto the platform. Navigate to the top navigation bar and click on the signature icon.
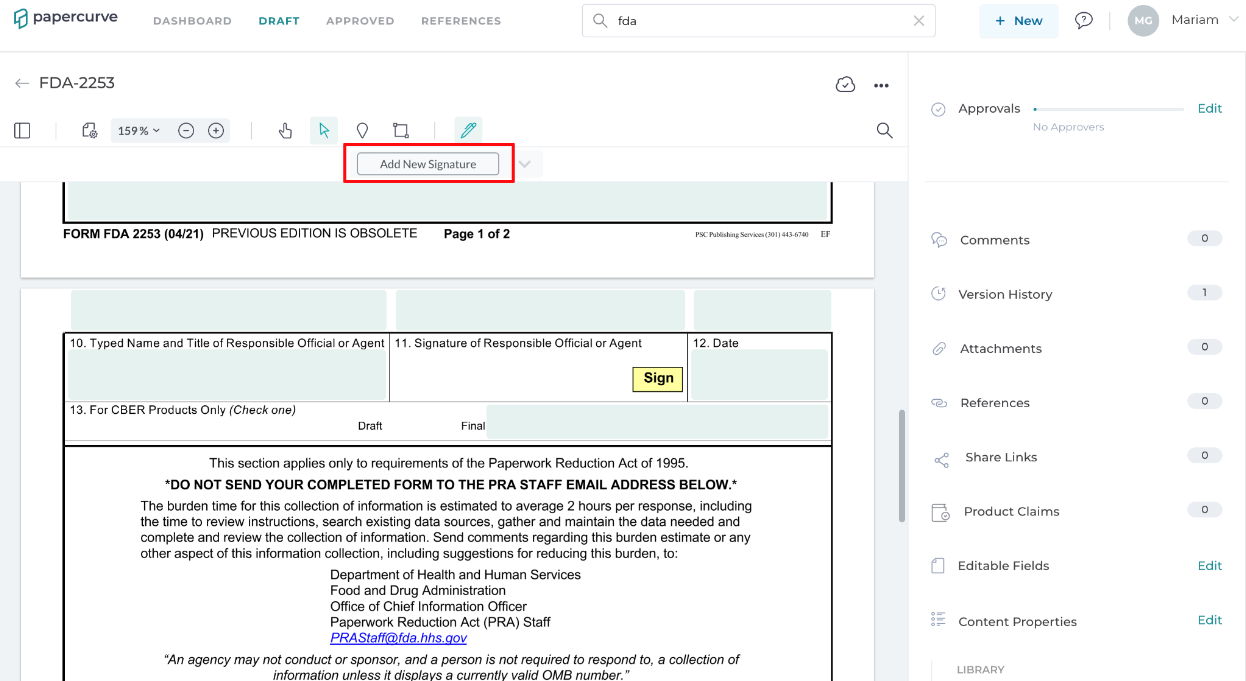
2. A new toolbar will appear below the icon, click Add New Signature to upload your signature to the document.
3. You can now choose to either draw your signature, type it or upload it from your computer.
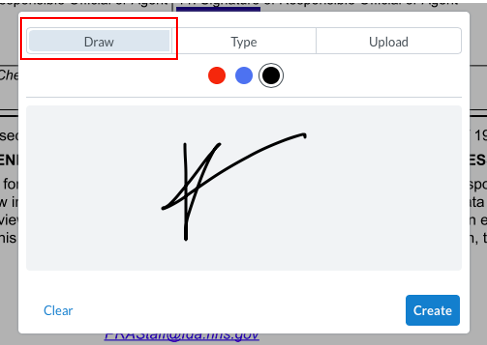
To draw your signature:
Simply click Draw and use your mouse to manually draw your signature onto the pad.
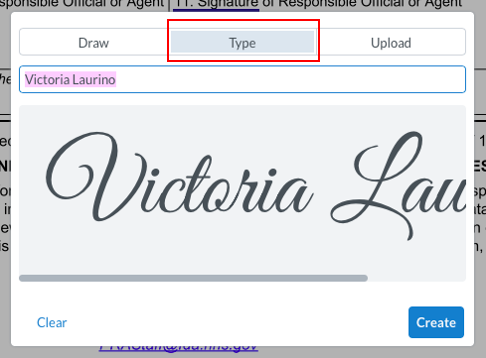
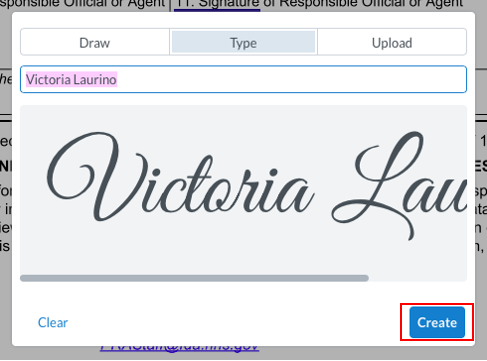
To type your signature:
Simply click Type and type in your name in the text box - a handwritten signature will automatically appear on the pad.
To upload your signature:
Click on Upload and then Choose a signature to select a signature file from your computer.
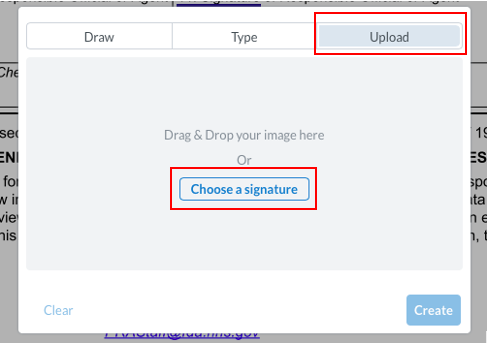
4. When finished click Create to upload your signature to the document.
5. To add your signature to the document, move your cursor to the area in which you would like to leave your signature.
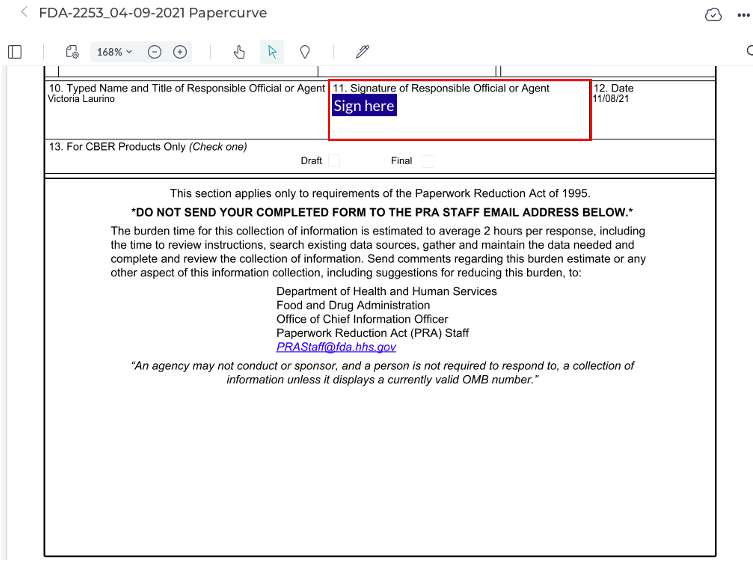
6. Select your written name from the signature toolbar and it will appear in the location you have chosen.

7. You can click on the signature to make edits to its placement, size and rotation by using the blue analogs.
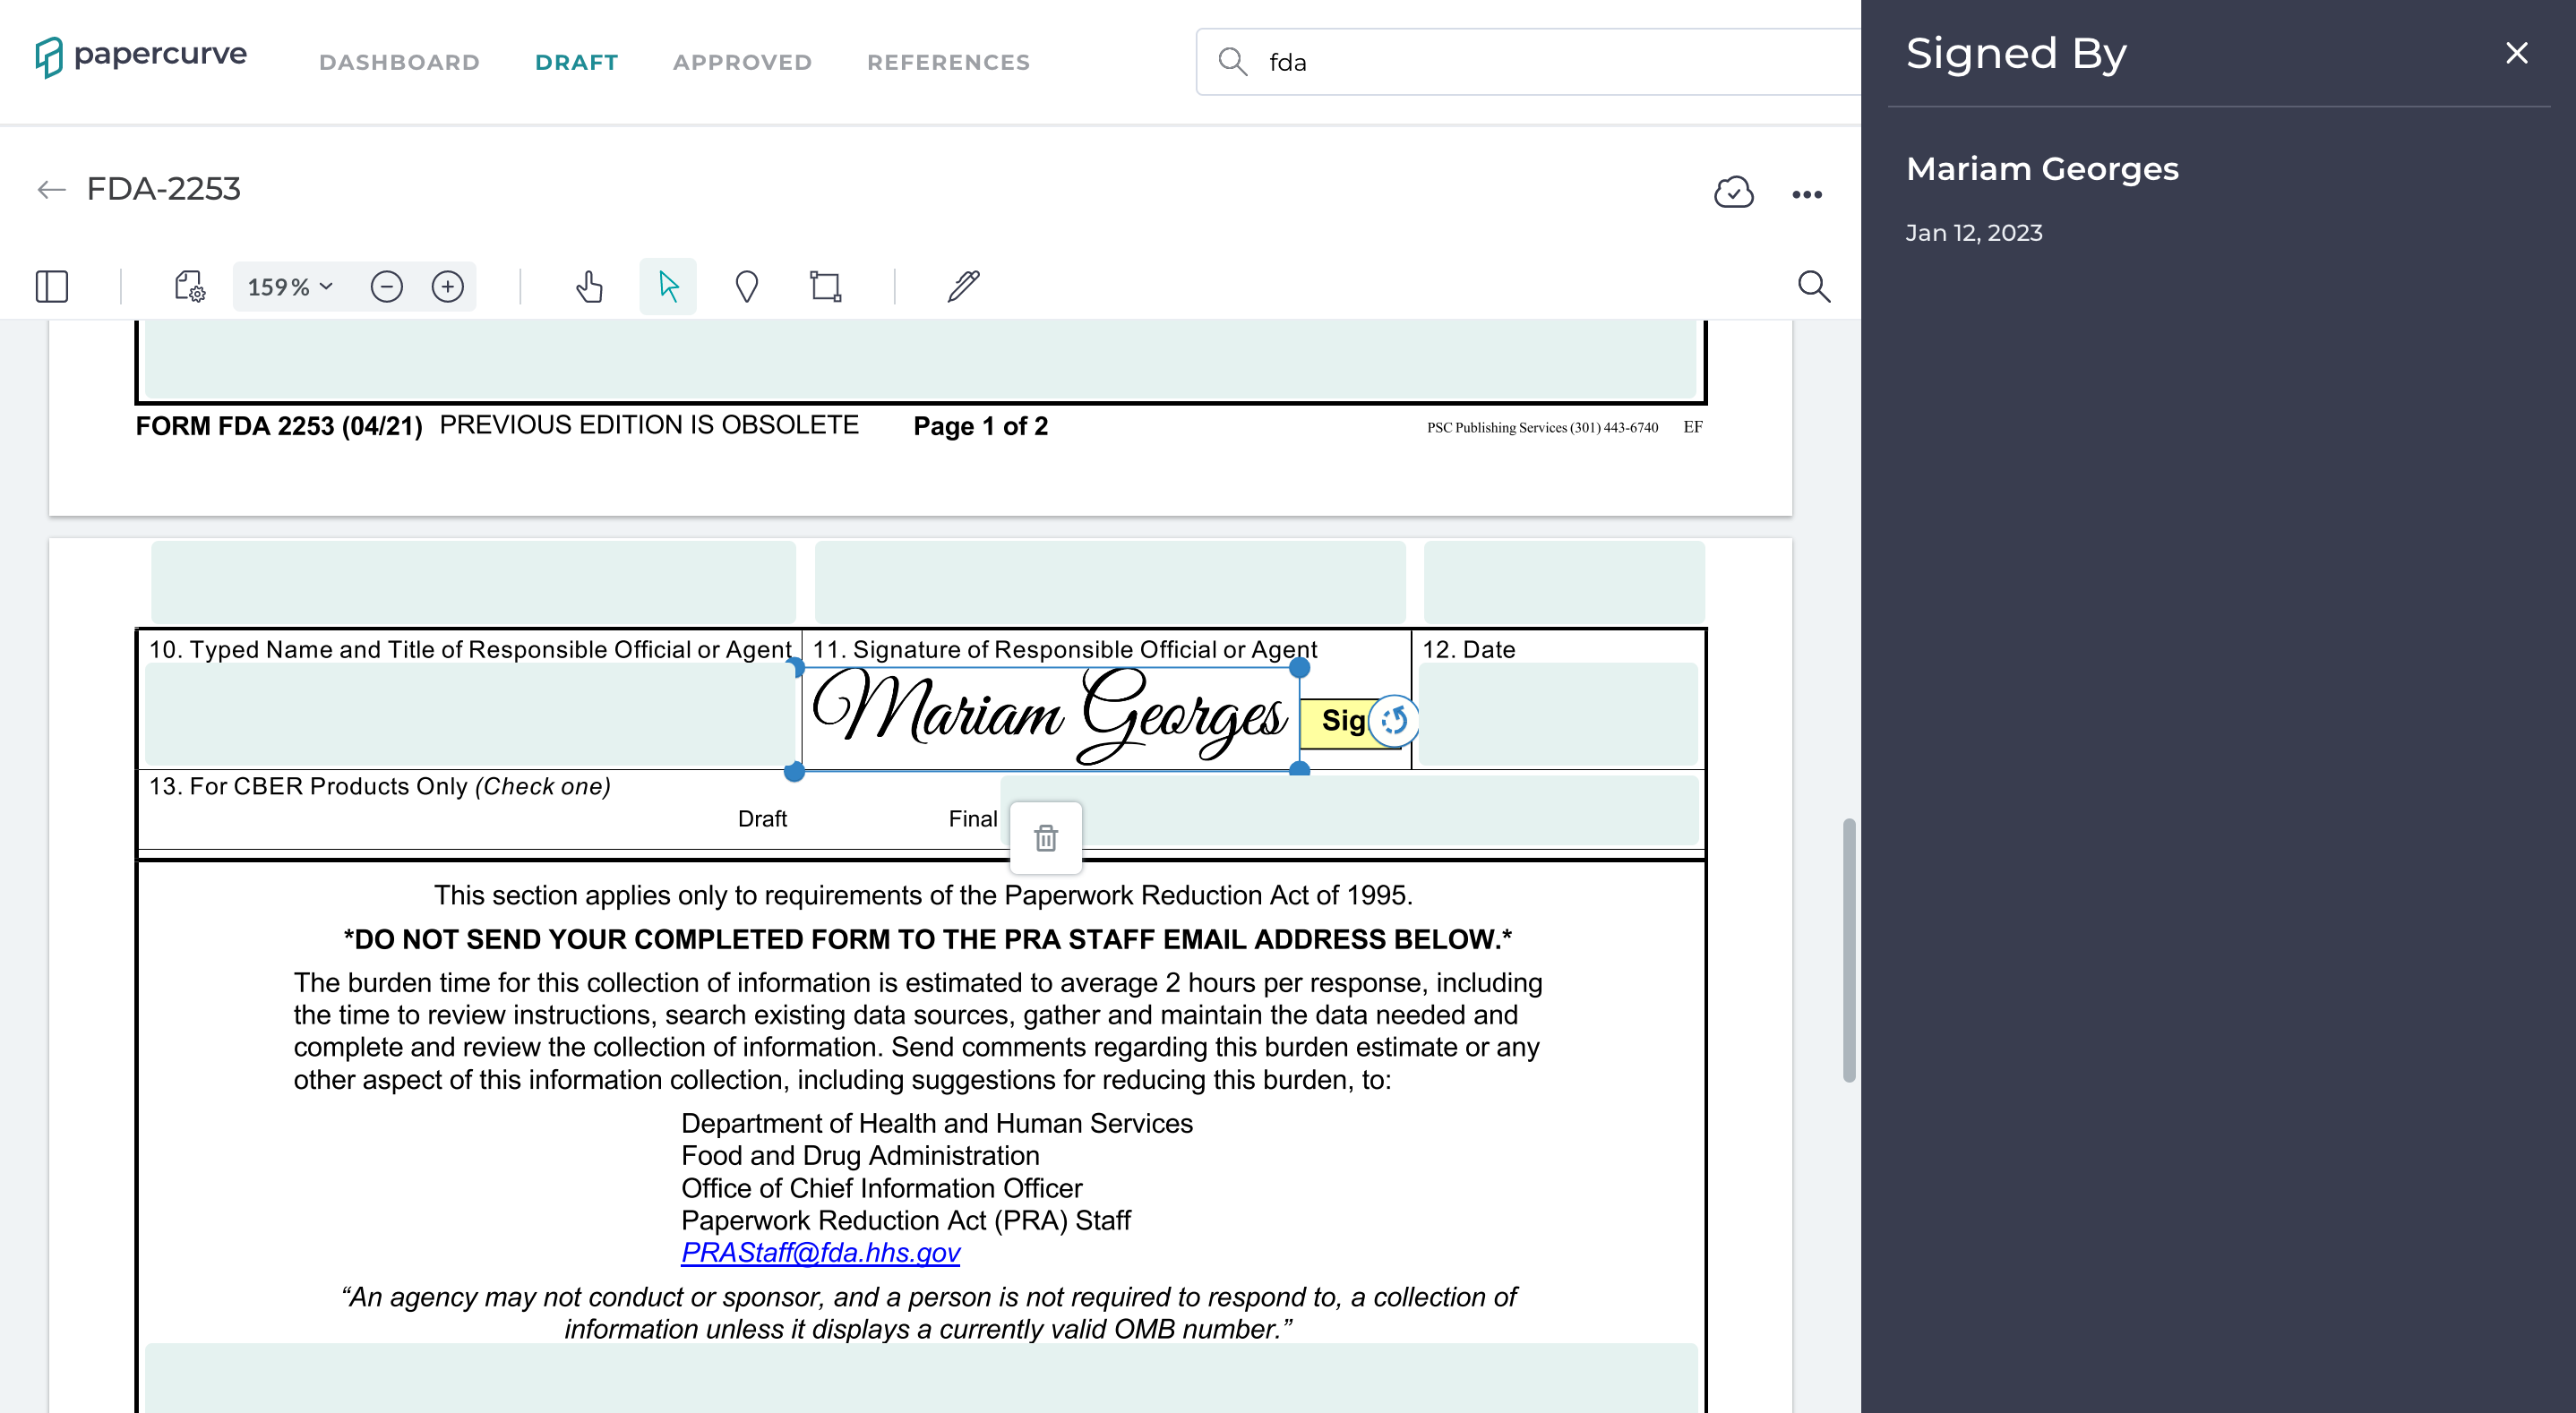
8. You'll notice that in the right hand side toolbar, the date and the name of the person who signed the document is indicated.

Note: All roles can sign a document and no role can edit a signature. The time, date and author of a signature will be logged. Once content is approved, signatures cannot be added.


