With Papercurve’s Job ID feature, each one of your unique documents can be equipped with an auto generated Job ID following your desired format. To enable this feature on your Papercurve Workspace, a request can be made to the Papercurve team to have your own customizable Job ID turned on for you.
With this automation, each piece of content you upload will automatically be assigned an ID that makes it easier to track content on Papercurve before, and after it is released and out in the public.
Once this feature is implemented on your Papercurve Workspace, you can simply proceed to upload your document as you normally would.
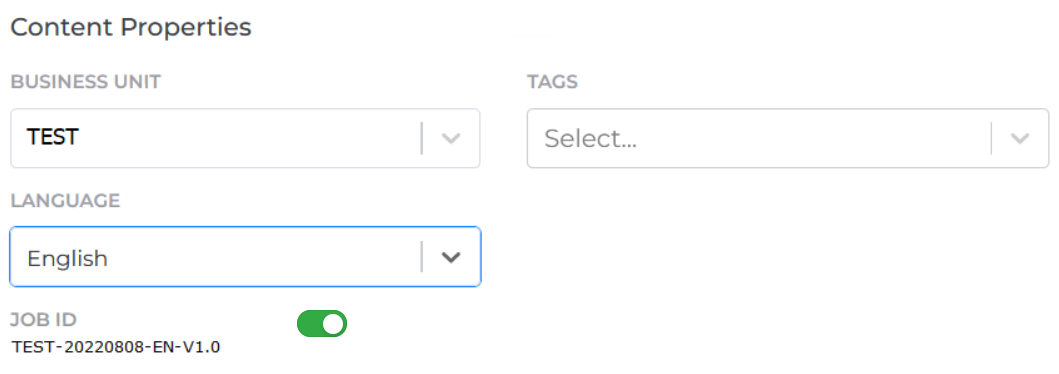
When uploading your document, you will notice that there is an additional field within your metadata called “Job ID” as shown in the picture below. This is where your automated job ID will appear each time you upload a new document. This Job ID will customize to the content properties that are selected, creating a Job ID is specific to your needs.

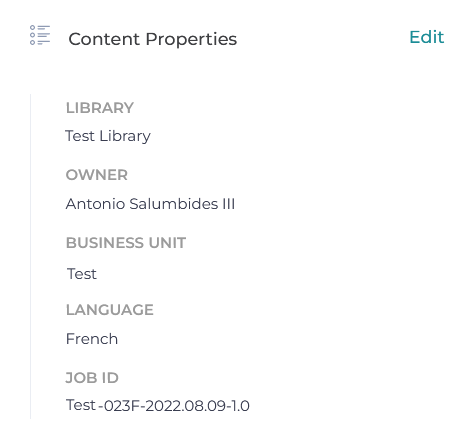
Additionally, you can also view your automated job ID on the side panel when editing your document under the “Content Properties” heading.

Both Authors and Viewers of the document will be able to see this feature, and the job ID will remain the same for a single upload in either draft or approved statuses of your content.
Version Tracking with Job IDs
Depending on customization requests there is also automatic version tracking on these IDs to better indicate the version number.
Uploading new versions of a single document will generate a version specific Job ID depending on which version was uploaded.
For Example:
The first version has the Job ID: Test - 023F - 2022.08.09 - 1.0
The second version will have the Job ID: Test - 023F - 2022.08.09 - 2.0
Disable Job ID
If for some reason a Job ID is not required, there is a toggle to turn off Job ID creation for that specific document uploaded. Simply click the toggle so it is active and it will prevent the generation of Job IDs.


