Verified Emails can now be sent manually. In this tutorial, we'll explore a valuable feature that mirrors the standard email creation process. Additionally, we've incorporated the functionality of generating email previews. This enhancement enables users to craft Verified Emails for manual dispatch, offering the convenience of previewing each generated email. This allows users to meticulously inspect and identify any potential errors before initiating the sending process.
Here’s how:
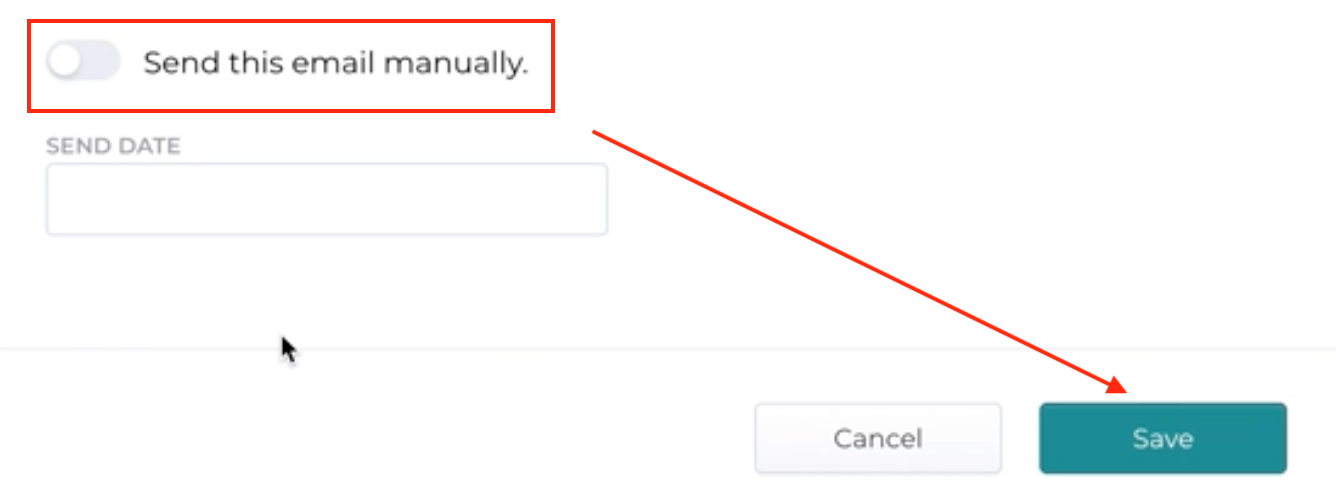
- Toggle on “manual send” once you have filled out all the fields for your verified email. Click “Save” to save your email and return to the Verified Email screen.
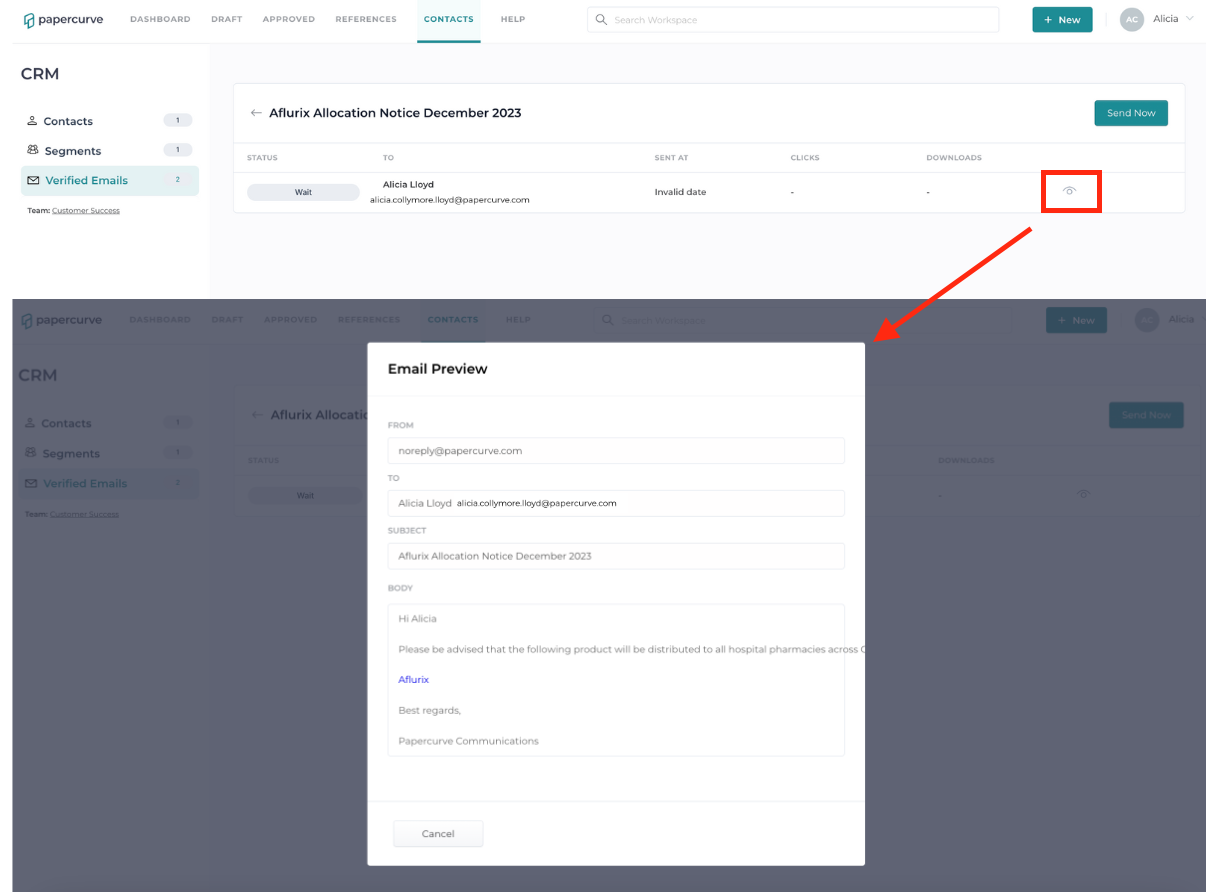
- Click the” mail icon” to begin sending your verified email.

- Prior to sending your email, you can preview the email by clicking the “eye” icon to ensure there are no errors and all information is correct.
- Click “Send Now” to manually send your email to the selected contacts/segments.

- Click “Confirm” once you are sure you want the email to be sent. This pop-up will notify you of how many emails will be sent.

- Your email status will change to ”Pending” then to “Completed” after all emails have been sent. Changes to the email can only be made when the status is in “Pending”.
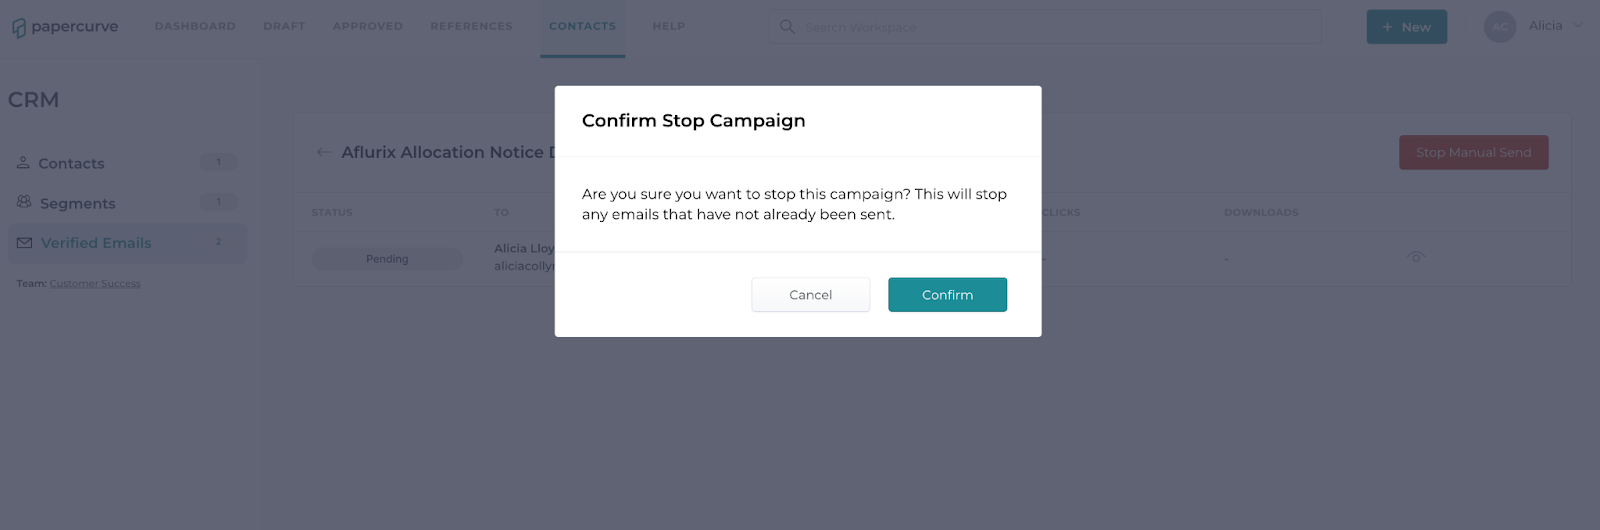
- To stop a manual send, click “Stop Manual Send”. Emails can only be stopped when the status is in “Pending”.

- Click “Confirm” if you are sure you want to cancel the manual email send.
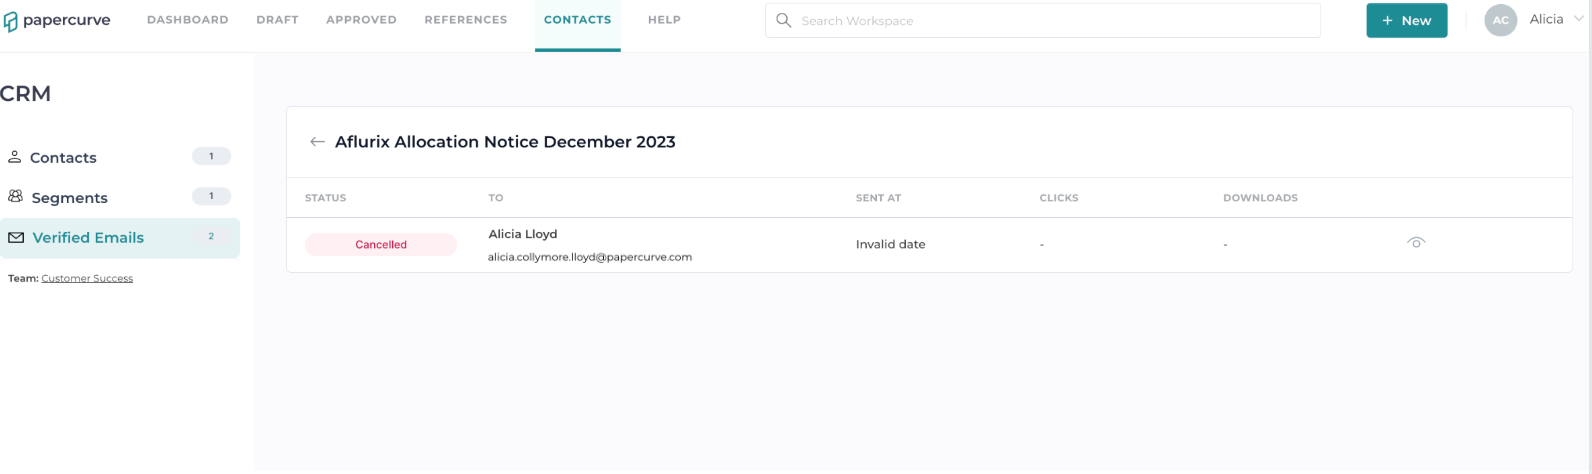
- Your email status will change to “Canceled” and this email will no longer be valid.