Papercurve CRM Verified Email offers the flexibility to manage multiple signatures for verified emails, allowing users to personalize their communication for different contexts or roles. This feature streamlines the email creation process and ensures consistency across various correspondences. Below are step-by-step instructions on how to set up and utilize multiple signatures within Papercurve CRM Verified Email.
Adding Email Signatures
To add different signatures in Papercurve CRM Verified Email, users must reach out to their dedicated customer success manager. The customer success manager will guide users through the process, assisting with the creation and implementation of multiple signatures tailored to their needs.
Applying Email Signature to Email
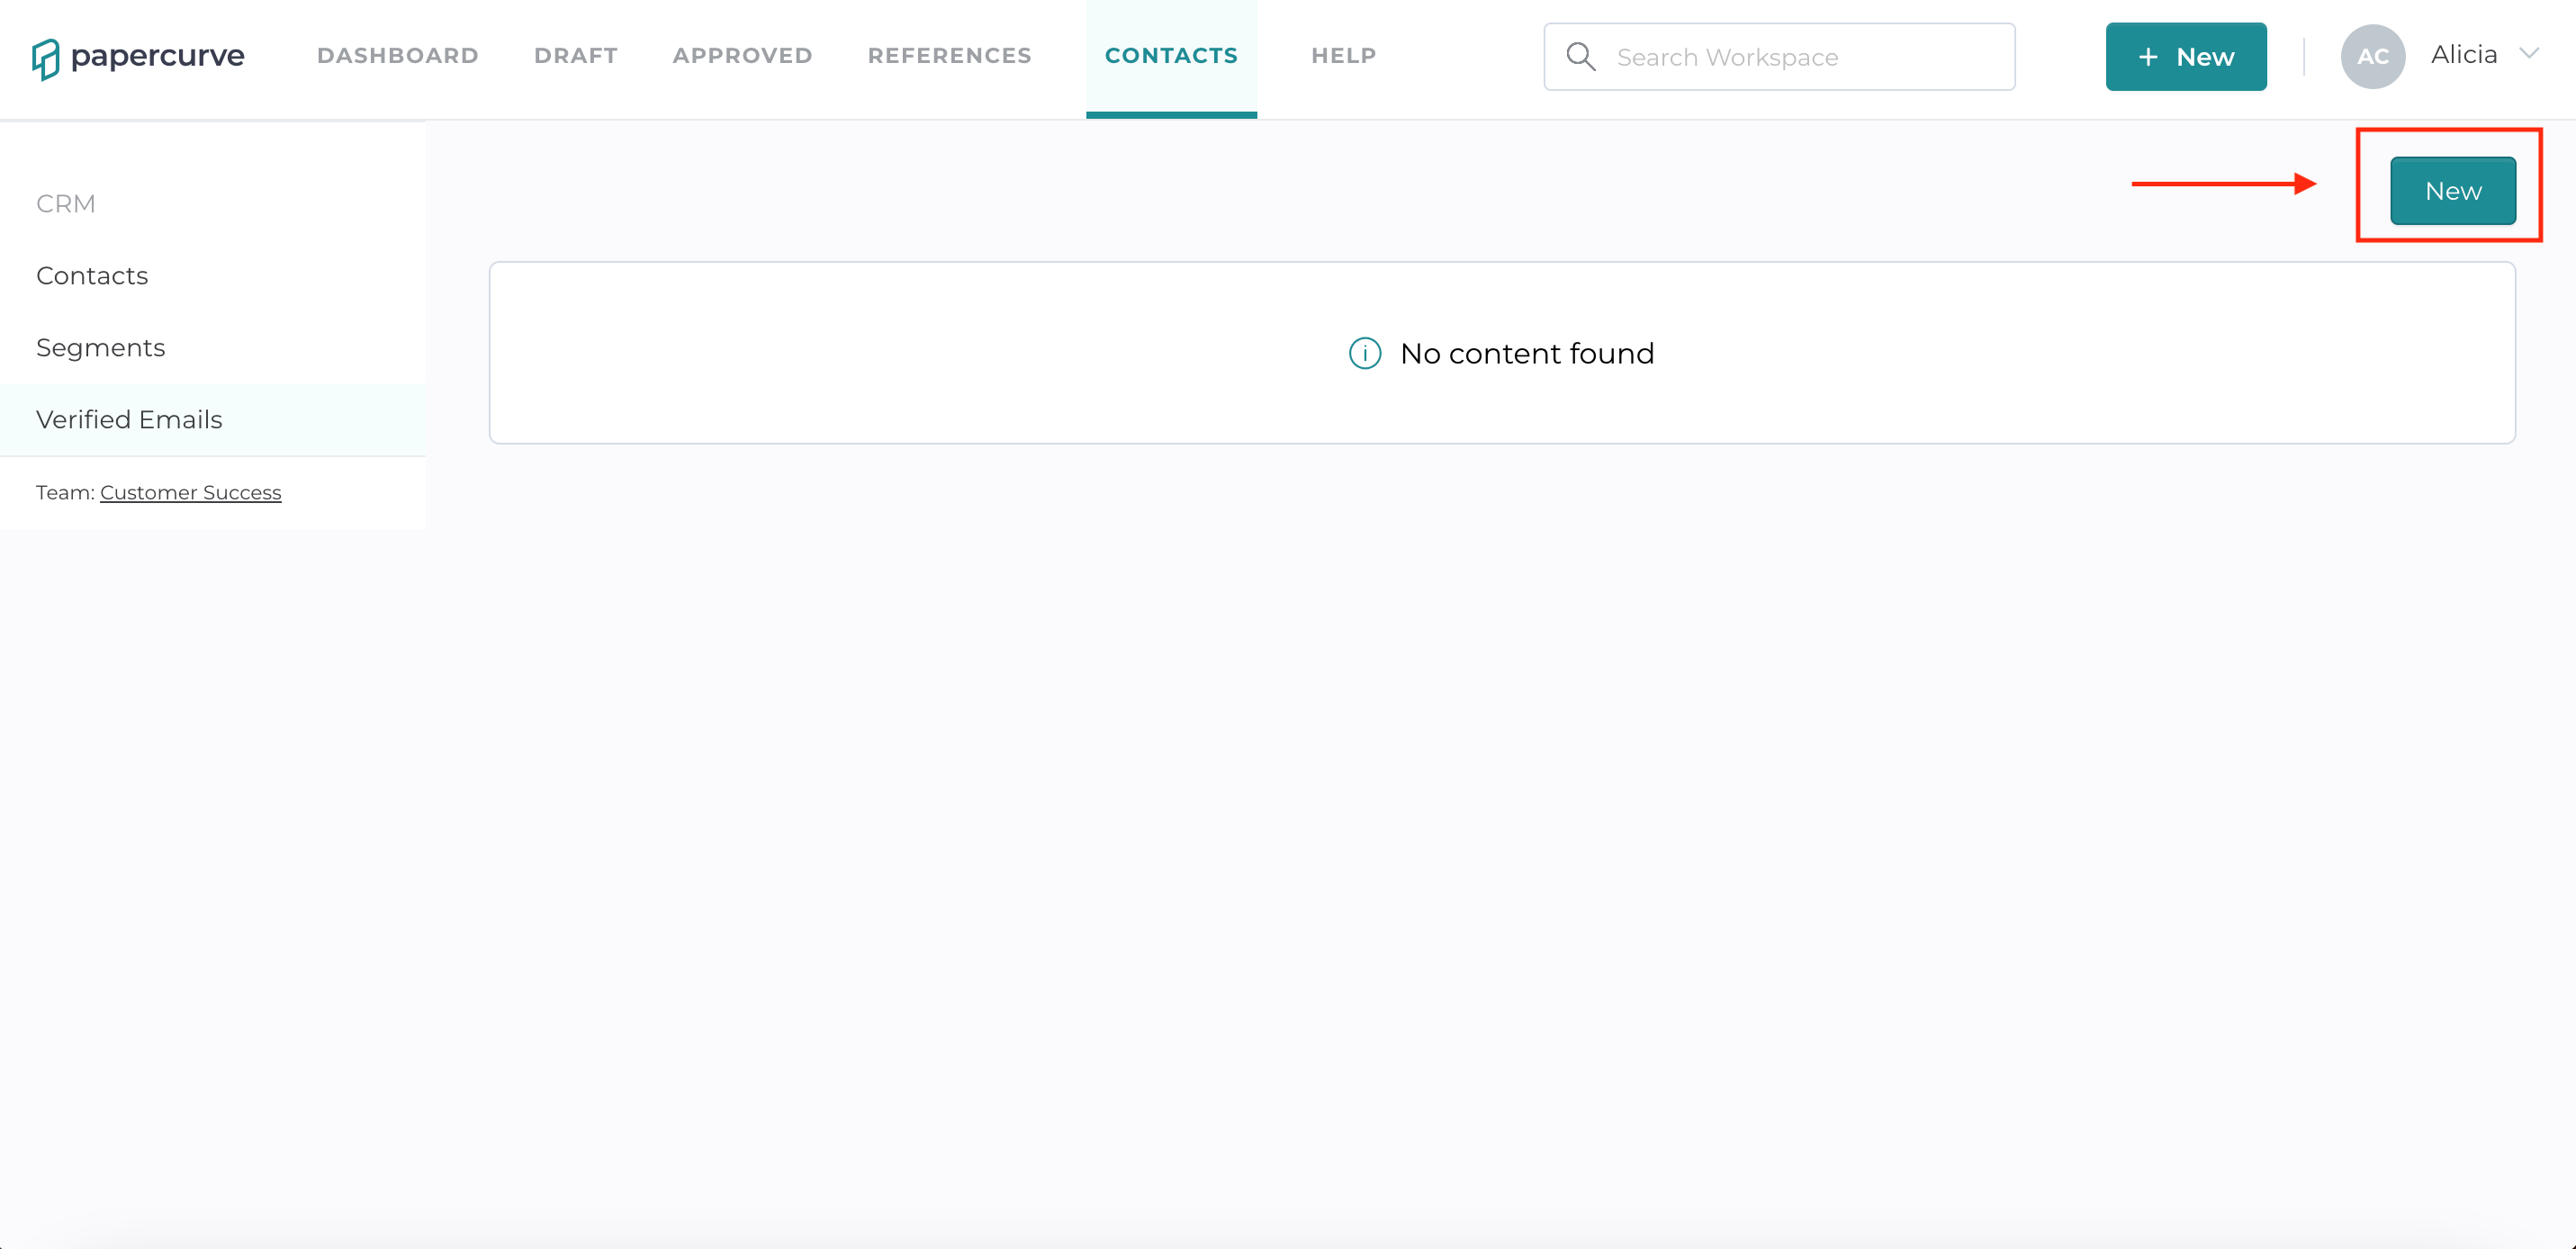
- Select "Contacts" in the navigation bar. Select "Verified Email" in the left sidebar then select "New" in the right corner of the screen to start a new email.
- Fill in the field of your email then select " Email Signature" to view a drop-down of all available email signatures for your team.
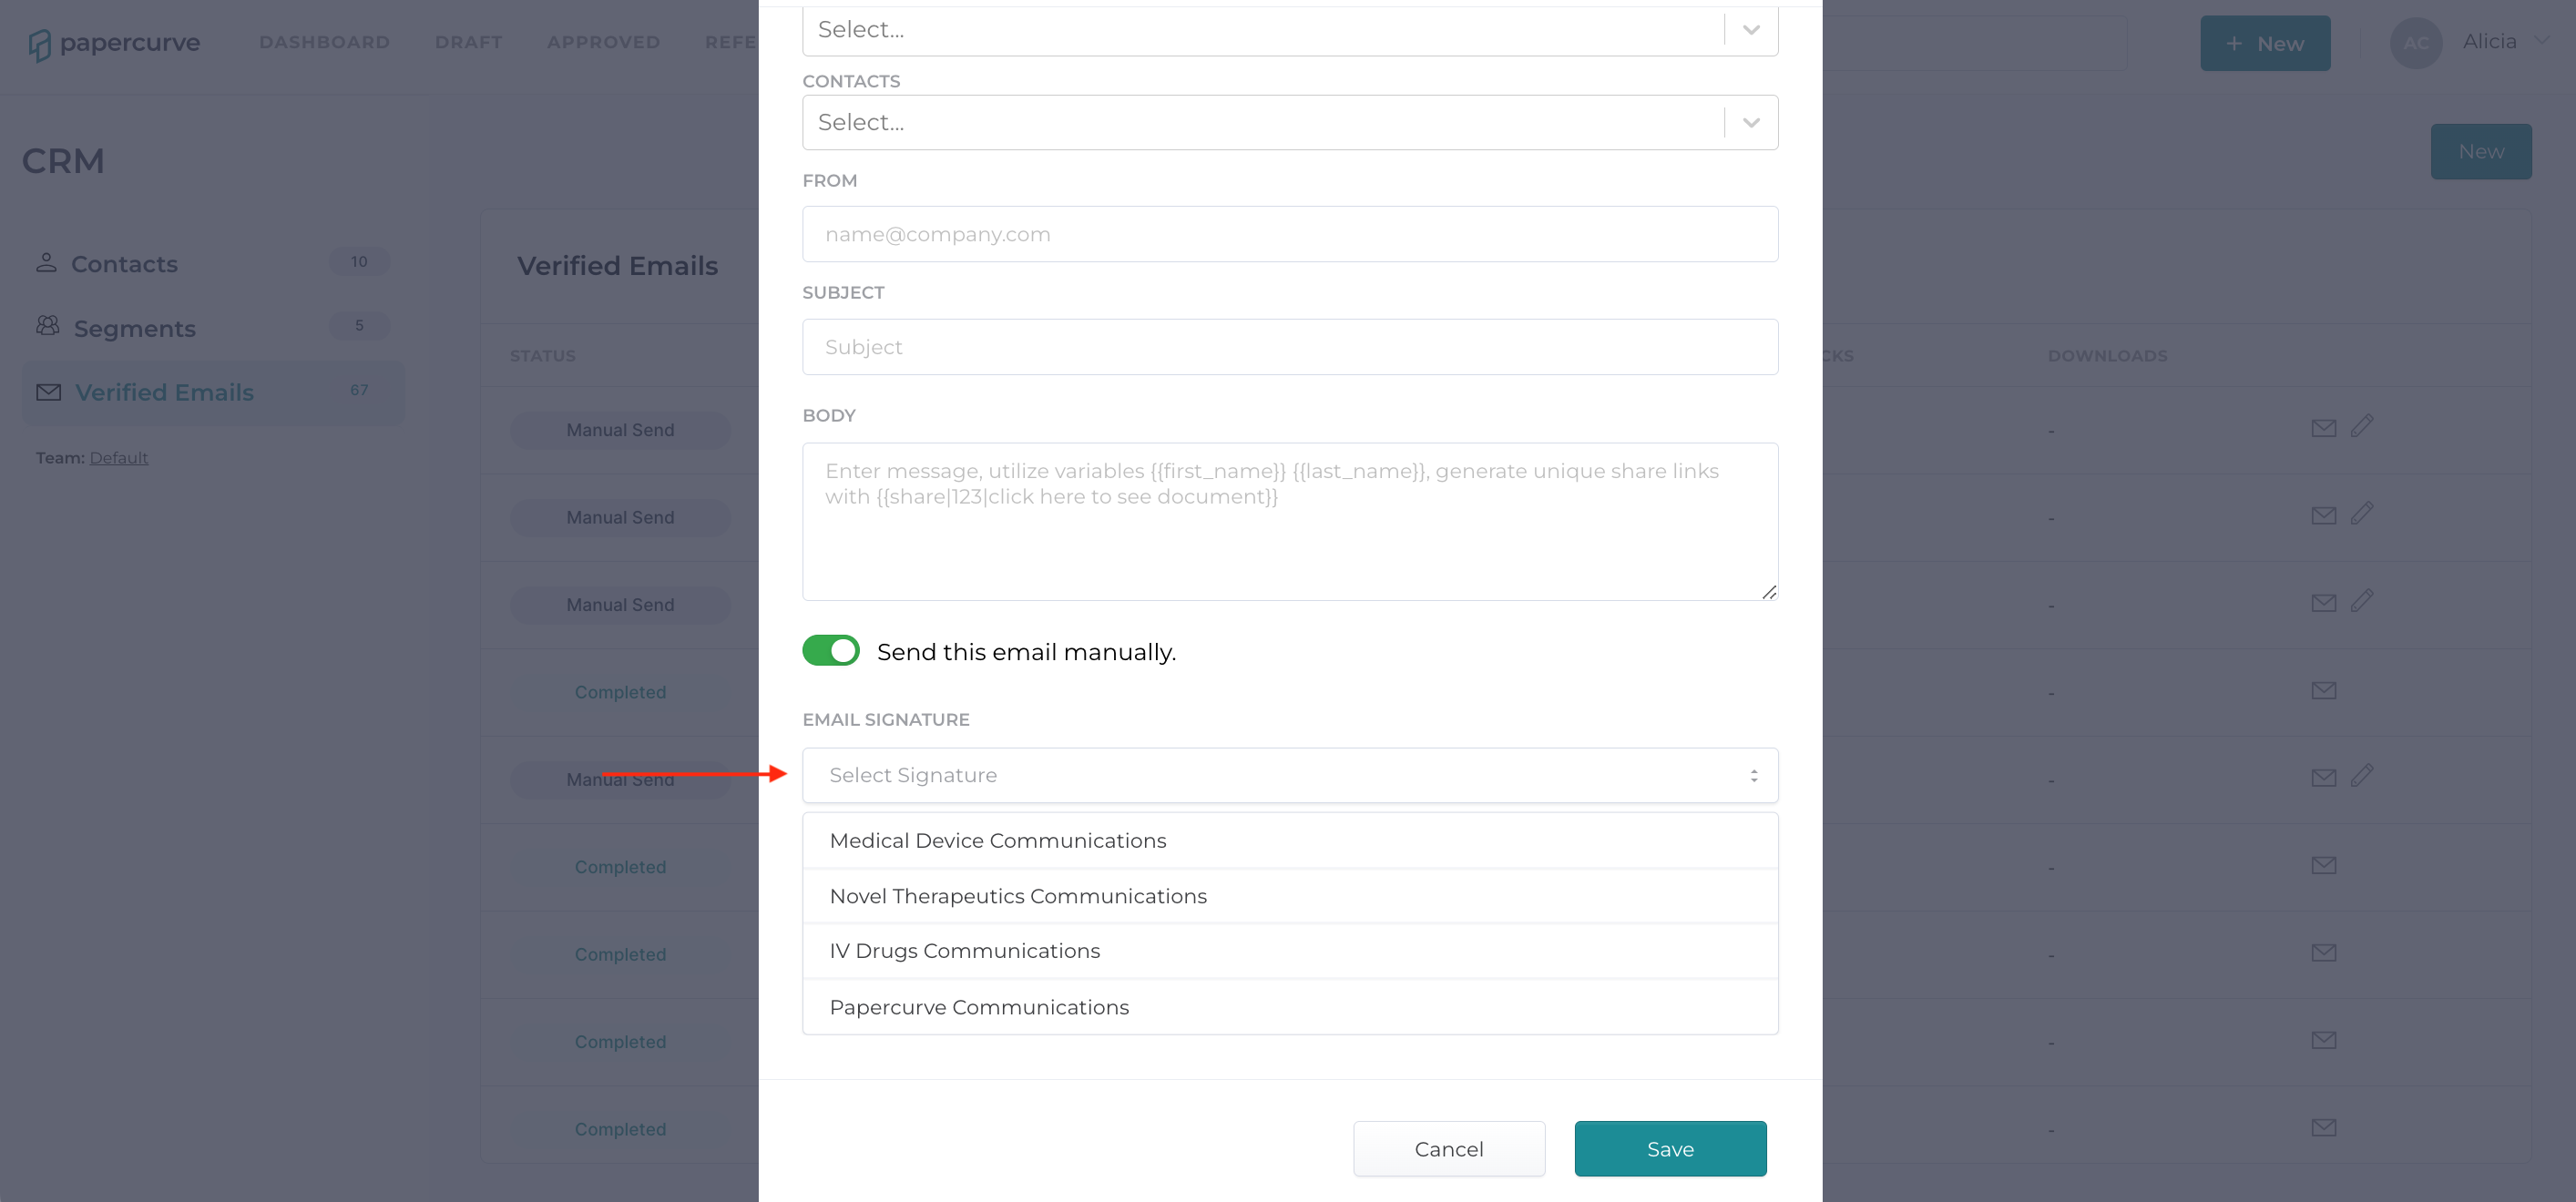
- The selected email signature will now be present in the outgoing verified email. A email signature must be selected in order for it to show in the outgoing verified email. If you do not select an email signature, no email signature will be present in the outgoing verified email.
Please note: Email signatures are specific to Papercurve Teams. You will only have access to see email signatures of users within your Team. You will not have access to see all available emails signatures for each user within your organization.
