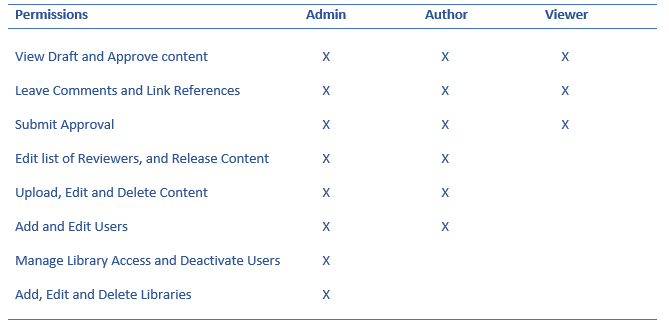
Within Papercurve, you have the ability to assign and control what other users can do on the platform depending on the tasks you want each user to be responsible for. User Roles give Administrators the ability to control what users can do within the system, without giving full administrator access. A role is a collection of permissions which could be based on a job function. Each role has specific permissions, settings, and functionality to influence content. There are 3 types of User Roles - Admin, Author and Reviewer.
The table below illustrates the permissions that each User Role has:

Assign User Roles
1. To access User Roles and their settings, click on the your user located along the top navigation bar on the right hand side of the page.

2. Next, click on Workspace from the drop down menu that will appear.

3. Navigate over to Users located on the side panel. Then, click on Create User.

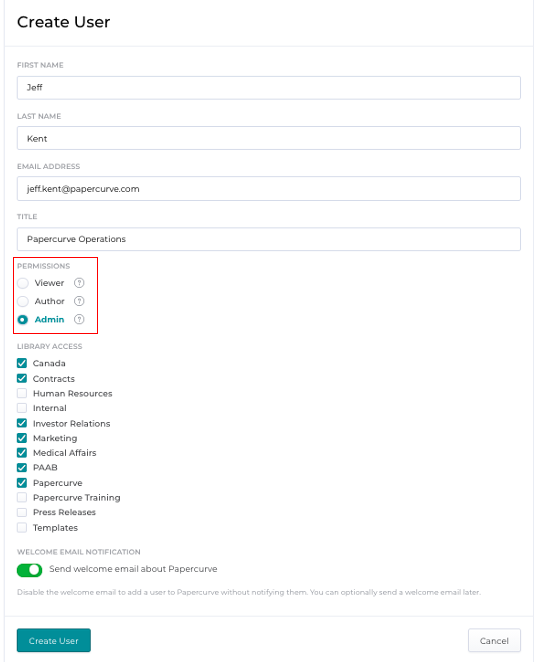
4. On the panel that will appear, you will have the option to enter all of the relevant user information.

5. You will notice that you have the option to enter the user role (Reviewer, Author, Admin) under Permissions.

6. You also have the ability to choose which libraries the user will have access to under Library Access.

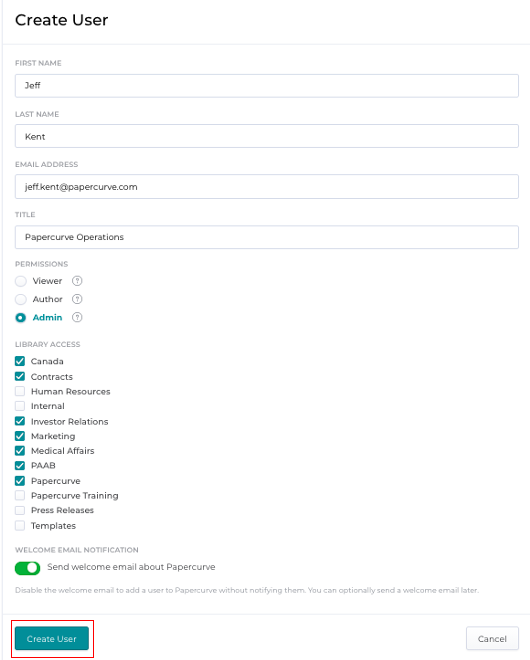
7. When finished, click on Create User.

8. The user has now been created and they will receive an email to create a password.
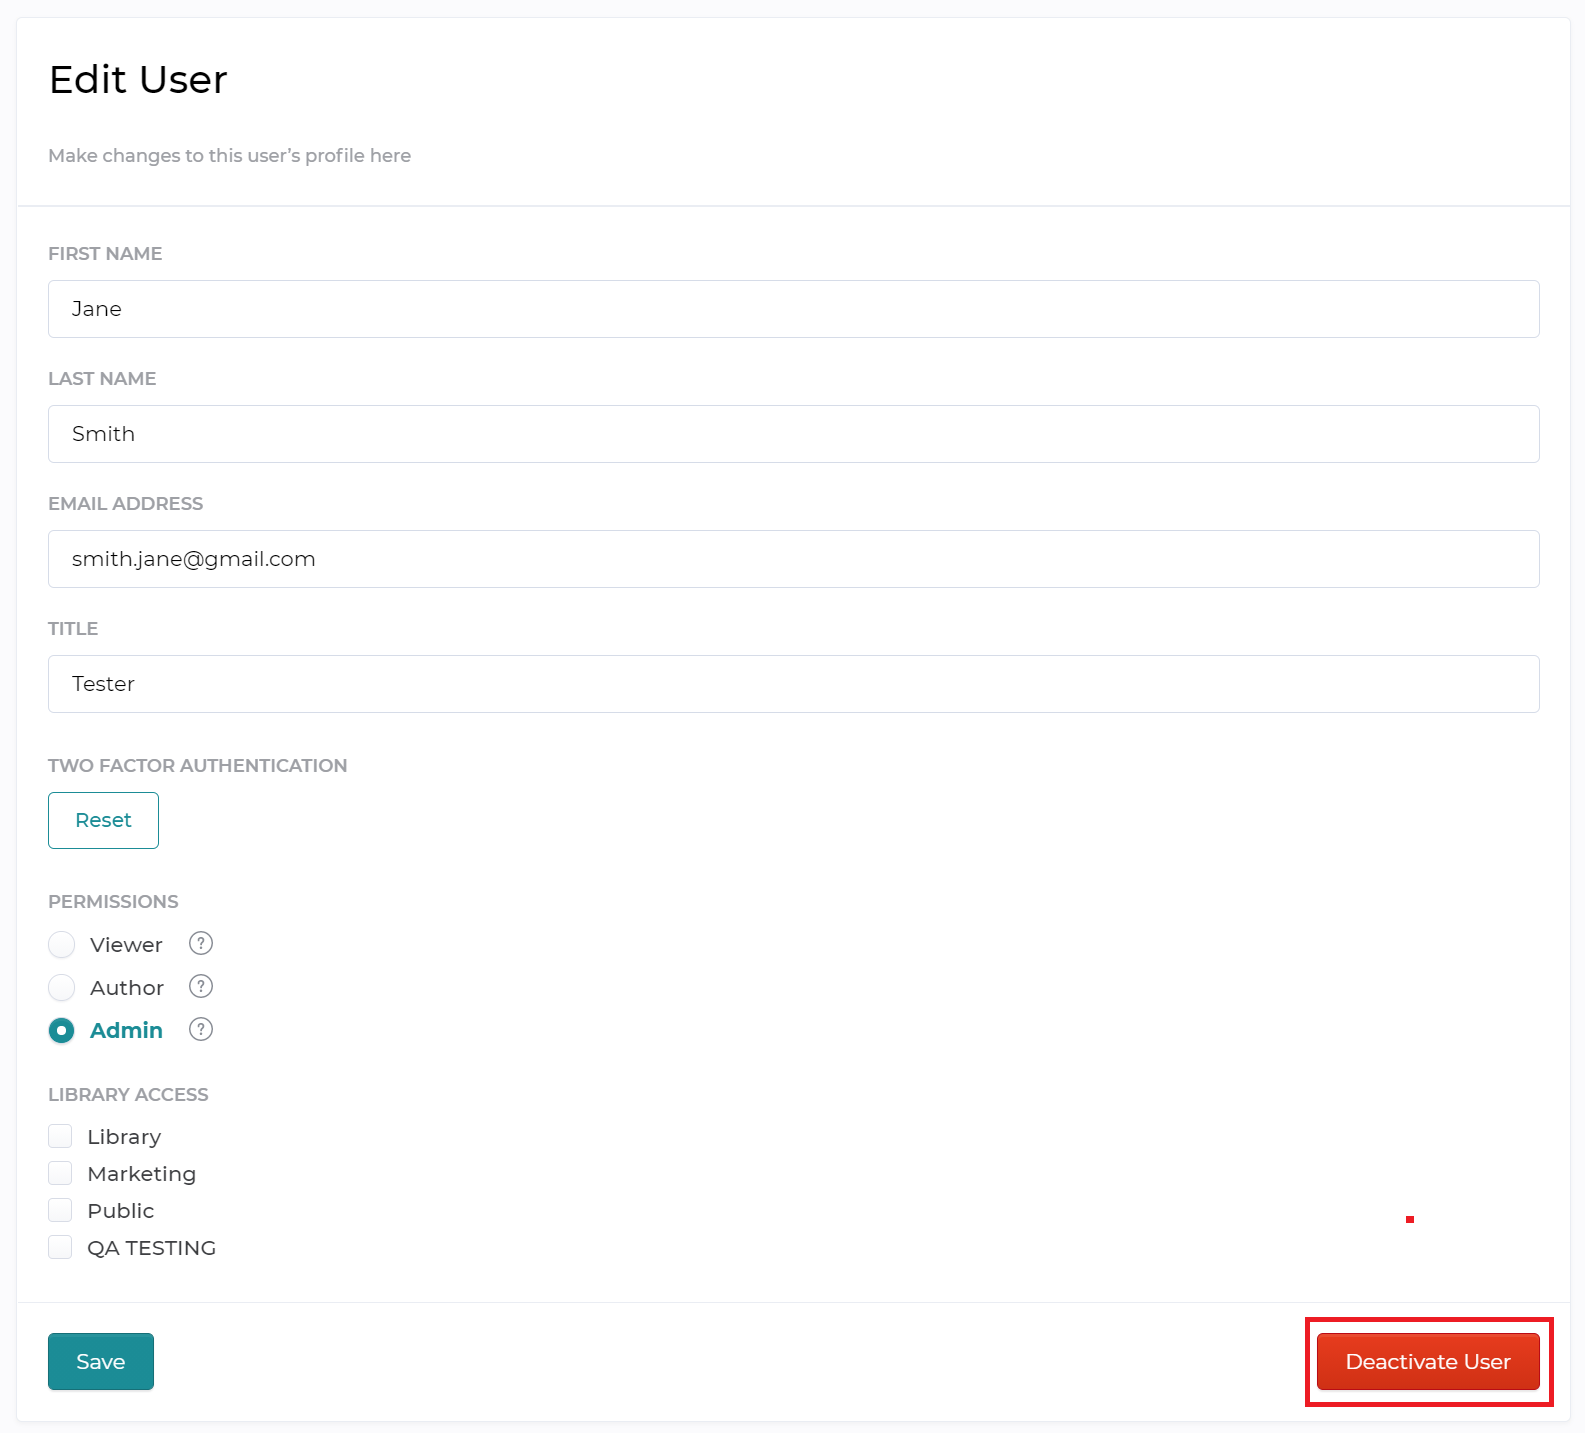
Deactivating /Activating Users:
If there are inactive users who have been revoked of their account privileges, you can deactivate them. Deactivating users prevents them from being able to access Papercurve at any capacity while preserving their historical user’s history and data with the platform. If a user gets deactivated by accident you can always reverse this action the same way you would edit a user.


